I used the cinnamon sugar from my previous post to make these delicious Cinnamon Pinwheels that I recommend everyone should try.
I’ve posted the recipe link below.
From reading the reviews at the website, it seems that people have been having some trouble with making them, for various reasons.
I had no trouble at all. I by all means don’t mean to brag, rather that I used some basic techniques and tips that I would say helped out a great deal.
I’ve put the tips / techniques under each photo of each step of the recipe. If you want the actual recipe you have to follow the link below.
I really hope my tips help. It was such a shame to see this stand-out recipe only get 3 starts and some very confused reviews.
So without further ado, here are my tips:
1. Always use room temperature ingredients. My butter & Egg are both at room temperature for at least 2 hours before I use them. Why? Because room temperature butter beats more easily and evenly.For the egg, if you add a cold egg to the whipped butter & sugar, it will cause the butter to re-solidify unevenly and when you mix in the flour, it won’t mix in well.

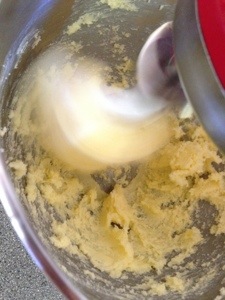
2. When it says beat the butter & sugar (or creaming), beat it!. Some people are quite shy about beating butter and sugar. For any recipe that require “creaming”, you need to beat it until it creams i.e. resembles a creamy, paler version of what it previously was. Butter is naturally yellow in colour. When you beat it with sugar, it becomes much paler and softer. Obviously if you use a darker sugar such as raw or muscovado, you need to make sure that it looks whipped. If you use a stand mixer, always scrape down the bowl at least once and beat it again. This will ensure consistency.

See the difference between the photo twice above and the photo above? This is creamed butter.

Room temperature egg!

3. Incorporate the flour, salt and bi-carb soda in batches. It’s a lot easier to stir. If you put it all in in one go, it get very, very messy. Don’t over beat the mix, but beat it well enough that the flour is no longer recognizable and well incorporated.
I don’t have a photo of the next step, which requires you to turn out the rubble onto a board, shape it and put it in the fridge to solidify for an hour or so. This part is important too so I have a tip (but no photo).
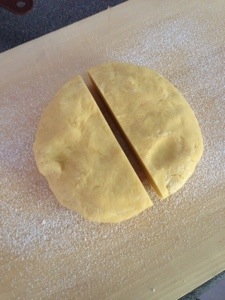
4. Shape the mixture and separate it at this stage. When I say shape, mold it into a square as per the recipe to be rolled out later. After all, when you roll it out you are supposed to roll it into a square / rectangular shape so why not do it now while the dough is still soft?
5. ‘Melt’ in all crumbly rubble. Again, no photo sorry. But as you can see from my dough below, it looks quite smooth all over. This is not how it looks when you turn out the mix on the board. The mix starts of as crumbly rubble. You need to use the warmth of your hands to shape it how you like. Why do I do this? Because when you roll it out you get a more complete dough with less cracks. If you see two photos down, the rolled sheet has very little deep cracks from the edge.
Wrap each portion individually with cling wrap and place in the fridge to set.

6. When rolling out, keep it dusty. I always use icing sugar to dust cookies, not flour! As you need to turn it over, roll, turn it over, roll (you get the point) to get the mix into a sheet form, by using flour you will just end up with a solid piece of flour dough that is crumbly and impossible to roll out. When baked, it will also be dry. Always dust the top with icing sugar before you over turn it and always dust before and after you roll. In other words, every time the cookie dough touches anything (board, rolling pin) it has to be duster first.
7. When rolling (into the pinwheel), start small. After you cover this cookie dough sheet with cinnamon sugar, start rolling it up like a sushi at one end. Start small and tight. Don’t worry if cracks appear. You should be able to smooth the small ones out with your fingers or by pinching the big ones together. Remember that it has to be a tight roll otherwise it will fall apart when cut.
The resulting roll should be about 35 centimeters wide.
Place the roll on a length of cling film and roll the cling film tightly around the ‘sausage’ like a lolly.
Once you’ve rolled it up, bunch up and hold the loose cling film at each end tightly.
Now roll it away from yourself along the bench.
Lift and repeat until the cling film is bound tightly around the dough,
like this:

Refrigerate and cut up, just like a sushi roll.
Bake and you will get this:

Hope that helps and do try it!
